The Ultimate Red Velvet Cake From Scratch (Moist, Velvety, and Showstopping)
- Sep 10, 2024
- 8 min read
Updated: May 12

Red velvet cake has always been a crowd favorite, known for its rich texture, vibrant red color, and delicious cream cheese frosting.
This is a very versatile cake that can be used for may occasions like Christmas, Valentines Day and birthdays.


This recipe is straightforward yet elegant, and I’ll walk you through it step-by-step while sharing some handy tips along the way. Let’s get baking!
Why This Red Velvet Cake From Scratch Works
Red velvet cake is one of the most misunderstood cakes in baking. Most people think it's just chocolate cake dyed red. It's not — and this recipe proves it. Here's what makes this one different:
Buttermilk AND vinegar for double the tang. Most red velvet recipes use one or the other. This recipe uses both — and the difference is noticeable in every single bite. Buttermilk adds a creamy, mild acidity that tenderizes the crumb and keeps it moist. The vinegar adds a sharper, brighter tang that cuts through the sweetness and gives red velvet its signature flavor that people can taste but can't always identify. Together they create a depth of flavor that one ingredient alone simply can't replicate.
The acidity does more than flavor. Both buttermilk and vinegar react with the baking soda in the recipe to create lift. This is what gives red velvet cake its light, tender crumb — not just the mixing technique but the chemistry happening inside the batter. It's also what helped give traditional red velvet its natural reddish hue before food coloring became common, as the acid reacted with unprocessed cocoa powder to bring out reddish-brown pigments.
Liquid food coloring for that iconic red. Gel coloring is more concentrated but liquid coloring blends smoothly into the batter without affecting texture, giving you that classic, deep red color that makes red velvet unmistakable on the table. The key is adding it at the right stage — with the wet ingredients before the flour goes in — so the color distributes evenly throughout every layer.
Just enough cocoa. Red velvet walks a fine line. Too much cocoa and it becomes chocolate cake. Too little and it tastes like vanilla cake with food coloring. This recipe uses the precise amount that gives you that subtle, mysterious chocolate undertone that makes red velvet taste like itself — not quite chocolate, not quite vanilla, entirely its own thing.
Cream cheese frosting — not buttercream. Cream cheese frosting is the only correct answer for red velvet and here's the reason — the tang of the cream cheese mirrors the tang of the cake itself. Buttercream is too sweet and one-dimensional against red velvet's complexity. Cream cheese frosting creates a balance where the cake and frosting taste like they were made for each other, because they were.
Looking for more birthday cake ideas? Check out my Ultimate Birthday Cake Guide
Red Velvet Cake Ingredients
The Batter:
2 & 1/2 cups all-purpose flour
1 tsp baking soda
1 tsp cocoa powder
2 eggs
1 & 1/2 cups sugar
1 cup buttermilk
1 & 1/2 cups canola oil
1 oz red food coloring
1 tsp vinegar
1 tsp vanilla extract
The Cream Cheese Frosting:
8 oz cream cheese, softened
1 stick (1/2 cup) butter, softened
4 cups confectioners' sugar
2 tbsp whipping cream or milk
1 tsp vanilla extract
Directions
Step 1: Preheat and Prepare
Preheat your oven to 350°F (175°C). Grease and flour two 9-inch round cake pans, or line the bottoms with parchment paper for easy removal. This will help prevent the cake from sticking and ensure a smooth release.
Step 2: Mix the Dry Ingredients
In a medium-sized bowl, sift and then whisk together the all-purpose flour, baking soda, and cocoa powder. Set aside. This step helps evenly distribute the dry ingredients and avoid clumping.
Step 3: Cream the Eggs and Sugar
In a large mixing bowl, beat the eggs and sugar together using a hand mixer or stand mixer on medium speed until light and fluffy, about 3-4 minutes. This step is crucial for building the structure of the cake and ensuring a tender crumb.
Step 4: Combine the Wet Ingredients
In a separate small bowl, whisk together the canola oil, red food coloring, vinegar, and vanilla extract. This is the step where you achieve that signature red hue!
Step 5: Blend the Wet and Dry
With the mixer on low speed, gradually add the red dye mixture to the egg and sugar mixture. Once combined, slowly alternate adding the flour and buttermilk to red mix in batches, beginning and ending with the flour mixture. Mix just until everything is just combined. Overmixing can lead to a tough cake.
Step 6: Bake
Divide the batter evenly between the prepared cake pans. Bake for 25-30 minutes, or until a toothpick inserted into the center comes out clean. Let the cakes cool in their pans for about 10 minutes before transferring them to a wire rack to cool completely.
Cream Cheese Frosting Directions
While the cakes are cooling, it’s time to prepare the creamy frosting.
Step 1: Mix the Cream Cheese and Butter
In a large bowl, beat the softened cream cheese and butter together until smooth and creamy, about 2-3 minutes.
Step 2: Add Sugar and Vanilla
Gradually add the confectioners’ sugar, one cup at a time, while continuing to mix on low speed. Once fully incorporated, add the vanilla extract and whipping cream (or milk or liquid coffee creamer). Beat on medium-high speed for another 2-3 minutes until the frosting is light and fluffy.
Assembling the Cake
Once your cake layers have completely cooled, it’s time to assemble:
1. Place one layer on your serving plate or cake stand.
2. Spread an even layer of frosting on top of the first cake layer.
3. Place the second layer on top, ensuring it's aligned.
4. Frost the top and sides of the cake, smoothing it out with a spatula or spoon.
For a cleaner finish, you can refrigerate the cake for 15-20 minutes after applying a crumb coat (a thin layer of frosting). This step seals in any loose crumbs and makes the final layer of frosting look flawless.
Storing Your Red Velvet Cake
If you have any leftovers (though I doubt you will!), here’s how to store your red velvet cake:
Room Temperature: If you plan to serve the cake within a day, it can be left at room temperature in an airtight container. Make sure the room is cool to avoid melting the cream cheese frosting.
Refrigerate: For longer storage, cover the cake with plastic wrap or store it in an airtight container and refrigerate it. It will stay fresh for up to 5 days.
Freezer: You can also freeze red velvet cake! Wrap individual slices in plastic wrap, then in aluminum foil, and store them in the freezer for up to 3 months. To thaw, leave slices at room temperature or in the refrigerator for a few hours.
Baking a red velvet cake from scratch is a labor of love, but the result is well worth the effort. From its soft, velvety texture to its tangy cream cheese frosting, this cake is perfect for special occasions or simply to treat yourself! Follow these steps and tips, and you’ll have a show-stopping dessert that’s sure to impress.
Red Velvet Cake Variations
Red Velvet Sheet Cake Pour the batter into a greased 9x13 inch pan and bake at 350°F for 30–35 minutes. Frost with a generous layer of cream cheese frosting and top with red velvet cake crumbs from the trimmed tops for a classic finish. Perfect for feeding a crowd without the stress of stacking layers. [Link when published]
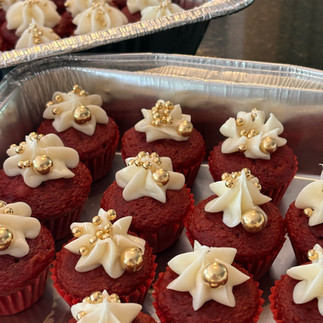
Red Velvet Cupcakes Fill lined cupcake tins two-thirds full and bake for 18–22 minutes. This batter makes approximately 24 standard cupcakes. Pipe cream cheese frosting in a tall swirl and finish with a sprinkle of red velvet crumbs. [Link when published]
Red Velvet Birthday Cake Stack three or four layers high with extra cream cheese frosting between each one. Press red velvet cake crumbs around the outside of the frosted cake for a stunning crumb coat finish that looks professional and takes almost no extra effort. [Link to birthday cake post]
Red Velvet Bundt Cake Pour the batter into a well-greased bundt pan and bake at 325°F for 45–55 minutes. Drizzle with cream cheese glaze instead of frosting for a showstopping presentation that requires zero decorating skills. [Link when published]
Frequently Asked Questions
What makes red velvet cake different from chocolate cake? Red velvet cake has a completely different flavor profile from chocolate cake despite both containing cocoa. Red velvet uses a small amount of cocoa — just enough for a subtle chocolate undertone — combined with buttermilk and vinegar for a signature tanginess that chocolate cake doesn't have. The texture is also different — red velvet has a finer, more tender crumb specifically because of the acidic ingredients reacting with the baking soda. It's not chocolate cake dyed red. It's its own thing entirely.
Why does red velvet cake use both buttermilk and vinegar? Both serve different purposes. Buttermilk adds a creamy, mild tang and tenderizes the crumb by breaking down gluten strands. Vinegar adds a sharper acidity and reacts with the baking soda to create extra lift and a lighter texture. Using both together gives the cake its signature depth of flavor — that tangy quality people recognize immediately but can't always name. It also helps the cake stay moist for longer after baking.
Why is my red velvet cake not red enough? Most likely not enough food coloring or the coloring was added at the wrong stage. Add your liquid food coloring with the wet ingredients before the flour goes in so it distributes evenly. Don't be shy with the amount — red velvet needs enough coloring to stay vibrant after baking since the heat can mute the color slightly. If your cake is coming out brownish-red rather than bright red, add more coloring next time.
Can I use gel food coloring instead of liquid? Yes — gel coloring is more concentrated so you'll need significantly less than the recipe calls for in liquid. Start with about a third of the liquid amount and add more until you reach the color you want. The advantage of gel is that you need less of it. The advantage of liquid is that it blends more smoothly without any risk of streaking. Either works — just don't substitute them at a 1:1 ratio.
Why did my red velvet cake come out dense? Usually overmixing after the flour goes in. Once the dry and wet ingredients are combined, mix only until just incorporated. Every additional second of mixing develops more gluten which makes the crumb tighter and denser. The other common cause is cold ingredients — make sure your butter, eggs, and buttermilk are all at room temperature before you start so everything emulsifies properly.
What's the best cream cheese frosting for red velvet cake? Full-fat block cream cheese — not the spreadable kind in a tub — is non-negotiable. Tub cream cheese has a higher water content and will make your frosting runny no matter how long you mix it. Use softened butter and cold cream cheese for the best texture — yes, that combination sounds contradictory but it works. The cold cream cheese keeps the frosting stable while the soft butter gives it a smooth, creamy consistency.
Can I make red velvet cake ahead of time? Absolutely — and it actually gets better overnight as the flavors deepen. Bake the layers up to 2 days ahead, wrap each one tightly in plastic wrap, and refrigerate. Make the cream cheese frosting up to 1 day ahead and store covered in the refrigerator. Re-whip the frosting for a minute before using. Once frosted, the cake keeps covered in the refrigerator for up to 5 days. Let it come to room temperature for 30 minutes before serving for the best texture.
How do I get clean slices on red velvet cake? Two things. First — refrigerate the frosted cake for at least 30 minutes before slicing so the frosting is firm. Second — use a sharp knife dipped in hot water and wiped dry between every single cut. The hot knife glides through the cream cheese frosting cleanly rather than dragging it. For the cleanest slices and the most dramatic reveal of that red interior, slice straight down without sawing back and forth.
Why does red velvet cake use cream cheese frosting and not buttercream? Cream cheese frosting mirrors the tangy flavor profile of the cake itself — the tang in the frosting echoes the tang from the buttermilk and vinegar in the cake layers. Buttercream is too sweet and doesn't have any of that complexity. Ermine frosting — a cooked flour-based frosting — is the other traditional option and is less sweet than cream cheese frosting if you prefer something lighter. But cream cheese is the classic pairing for a reason. It's the combination that makes red velvet taste complete.